Cloud Server Security Baseline Checklist: What to Do in the First Week
A few years ago, one of my clients had a newly provisioned server compromised within two weeks. The investigation revealed a familiar pattern: default SSH port, no firewall, unnecessary services left running and exposed. The attacker scanned the open ports, found a known vulnerability, and escalated privileges.
"I thought cloud providers handled security," they said.
Providers handle platform security – the physical infrastructure and hypervisor. Everything inside your instance is your responsibility. It's the shared responsibility model. That's why the first week after provisioning is critical.
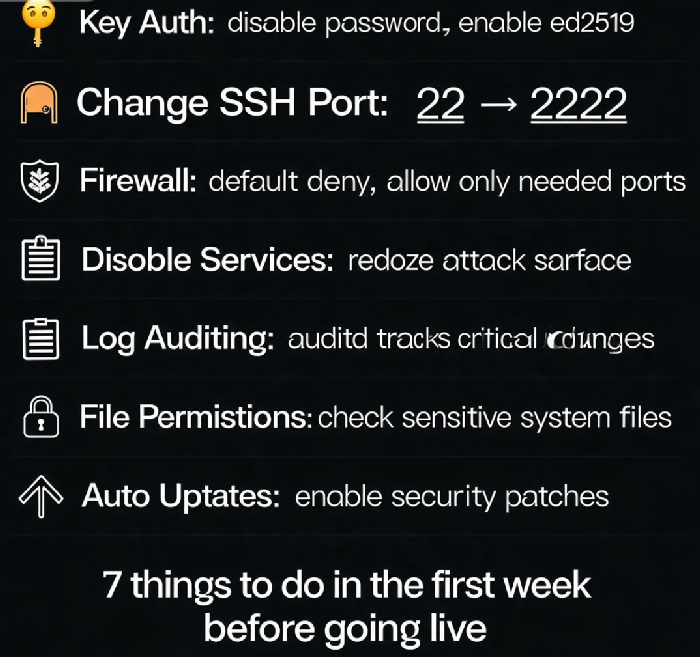
Below is a checklist you can follow before any new cloud server goes live. Based on real-world configurations I've used across hundreds of servers, it's designed to be practical — each step takes 5-10 minutes, and the entire list can be completed in an afternoon.
01 Disable Password Login, Enable SSH Key Authentication
Automated brute-force attacks are relentless. Monitoring shows an average of 2,500 unauthorized SSH attempts against a new VM within the first 24 hours. Password authentication is the target.
Key authentication uses asymmetric encryption — the private key never travels over the network, making brute-force attacks impossible.
bash
# On your local machine, generate a key pair using ed25519 (stronger and faster than RSA) ssh-keygen -t ed25519 -C "server-access" # Upload the public key to your server ssh-copy-id admin@YOUR_SERVER_IP # On the server, edit /etc/ssh/sshd_config PasswordAuthentication no PubkeyAuthentication yes # Restart SSH sudo systemctl restart sshd
Critical: Before disabling password auth, test key-based login from a separate terminal. If you lock yourself out and don't have out-of-band access (like a console), recovery becomes much harder.
02 Change the Default SSH Port
Changing port 22 to a non-standard high port filters out the vast majority of automated scanning. Bots scan port 22 heavily — switching to a random port above 1024 (e.g., 54321) keeps your logs cleaner.
text
# Add this to /etc/ssh/sshd_config Port 54321
Follow this order:
Add the new port first
Restart SSH and test the new port in a new session
Only remove port 22 after you've confirmed the new port works
Remember to update your firewall and cloud security group rules to allow the new port. Also update your local ~/.ssh/config to avoid typing the port each time.
03 Create a Non-Root User and Disable Root Remote Login
Operating as root directly is an invitation to attackers. Attackers target root by default — if the root password is compromised, the entire server is gone.
bash
# Create a dedicated admin user sudo adduser admin sudo usermod -aG sudo admin # Disable root SSH login in /etc/ssh/sshd_config PermitRootLogin no # Consider locking the root password entirely sudo passwd -l root
Use sudo -i when you need elevated privileges. Some cloud providers also offer browser-based terminals (e.g., OrcaTerm in Tencent Cloud) as a recovery path if SSH access becomes locked.
04 Configure a Firewall: Default Deny, Allow Only What's Needed
A firewall is your server's entry gate. Security groups on the cloud platform and the OS-level firewall serve as complementary layers. If one is misconfigured, the other can still hold.
bash
# UFW on Ubuntu sudo ufw default deny incoming sudo ufw default allow outgoing sudo ufw allow 54321/tcp # custom SSH port sudo ufw allow 80/tcp # HTTP sudo ufw allow 443/tcp # HTTPS sudo ufw enable
Principle: the simpler the firewall rules, the more secure the server. Close everything except what's explicitly needed.
Also configure the cloud platform's security group — it operates at the network infrastructure layer, independent of the OS-level firewall.
05 Disable Unnecessary Services
Every running service adds a potential entry point. Review listening ports and services, and disable anything that isn't required.
bash
# Check which ports are listening sudo ss -tlnp # List all enabled services systemctl list-unit-files --type=service | grep enabled # Disable a service if it's not needed sudo systemctl disable --now SERVICE_NAME
Common candidates to evaluate: postfix (mail server), avahi-daemon (mDNS), cups (printing — never needed on servers).
06 Keep the System Updated
Unpatched software is the most common cause of server compromise. New servers are often provisioned with outdated OS images that may contain known vulnerabilities.
bash
# Manual update sudo apt update && sudo apt upgrade -y # Enable automatic security updates (Ubuntu) sudo apt install -y unattended-upgrades sudo dpkg-reconfigure --priority=low unattended-upgrades # Verify it's set up cat /etc/apt/apt.conf.d/20auto-upgrades # Should contain: APT::Periodic::Unattended-Upgrade "1";
For production environments, test patches in a staging environment first before applying automatic updates to critical systems.
07 Install Fail2ban to Block Brute-Force Attempts
While key authentication prevents successful password attacks, Fail2ban reduces noise by temporarily banning IPs that repeatedly fail login attempts. This also reduces unnecessary load on your system logs.
bash
sudo apt install -y fail2ban # Create jail.local for custom settings sudo nano /etc/fail2ban/jail.local [DEFAULT] bantime = 86400 findtime = 600 maxretry = 5 [sshd] enabled = true maxretry = 3 sudo systemctl enable fail2ban && sudo systemctl start fail2ban
08 Kernel Hardening (sysctl)
A few kernel parameter adjustments can reduce the attack surface significantly.
Create /etc/sysctl.d/99-security.conf:
text
# Prevent IP spoofing net.ipv4.conf.all.rp_filter = 1 # Ignore ICMP redirects (mitigates MITM attacks) net.ipv4.conf.all.accept_redirects = 0 # Disable source routing net.ipv4.conf.all.accept_source_route = 0 # Enable SYN flood protection net.ipv4.tcp_syncookies = 1 # Randomize memory layout (ASLR) kernel.randomize_va_space = 2
Apply with:
bash
sudo sysctl -p /etc/sysctl.d/99-security.conf
09 Configure Log Auditing
For security incident tracking, you need records of who did what and when.
Install auditd to monitor critical files:
bash
sudo auditctl -w /etc/passwd -p wa -k identity_changes sudo auditctl -w /etc/shadow -p wa -k identity_changes sudo auditctl -w /etc/ssh/sshd_config -p wa -k sshd_changes
For monitoring logins and suspicious activity on an ongoing basis:
bash
# Failed SSH attempts sudo grep "Failed password" /var/log/auth.log | tail -20 # Successful logins sudo grep "Accepted" /var/log/auth.log | tail -20
If you want a deeper level of integrity monitoring, tools like aide can be installed to check for changes to system files, though this adds overhead and may be more appropriate for compliance-heavy environments.
The Bottom Line
The client whose server was compromised rebuilt it with this checklist. Three months later, their response was simple: "I have a process now. I don't worry anymore."
Security hardening doesn't directly generate revenue. But it prevents a single incident from taking down the entire business. This is the side of the shared responsibility model that is yours to manage, and it starts in the first week. A half-day of configuration early on protects you for years to come.